imported>Soleverlee 以“=生成秘钥= 首先生成秘钥,秘钥短语可以不生成。 <source lang="bash"> ssh-keygen -t rsa cat ~/.ssh/id_rsa.pub >> ~/.ssh/authorized_keys </source>...”为内容创建页面 |
小 Riguz移动页面CentOS:证书登陆至Linux ssh login via certificates,不留重定向 |
||
| (未显示同一用户的1个中间版本) | |||
| 第1行: | 第1行: | ||
= Ubuntu = | |||
<syntaxhighlight lang="bash"> | |||
ssh-copy-id riguz@10.226.21.75 | |||
/usr/bin/ssh-copy-id: INFO: Source of key(s) to be installed: "/Users/riguz/.ssh/id_ed25519.pub" | |||
/usr/bin/ssh-copy-id: INFO: attempting to log in with the new key(s), to filter out any that are already installed | |||
/usr/bin/ssh-copy-id: INFO: 1 key(s) remain to be installed -- if you are prompted now it is to install the new keys | |||
riguz@10.226.21.75's password: | |||
Number of key(s) added: 1 | |||
Now try logging into the machine, with: "ssh 'riguz@10.226.21.75'" | |||
and check to make sure that only the key(s) you wanted were added. | |||
</syntaxhighlight> | |||
=生成秘钥= | =生成秘钥= | ||
首先生成秘钥,秘钥短语可以不生成。 | 首先生成秘钥,秘钥短语可以不生成。 | ||
| 第14行: | 第29行: | ||
chown `whoami` $HOME/.ssh/authorized_keys | chown `whoami` $HOME/.ssh/authorized_keys | ||
</source> | </source> | ||
=修改sshd配置= | =修改sshd配置= | ||
<source lang="bash"> | <source lang="bash"> | ||
2024年2月29日 (四) 06:48的最新版本
Ubuntu
ssh-copy-id riguz@10.226.21.75
/usr/bin/ssh-copy-id: INFO: Source of key(s) to be installed: "/Users/riguz/.ssh/id_ed25519.pub"
/usr/bin/ssh-copy-id: INFO: attempting to log in with the new key(s), to filter out any that are already installed
/usr/bin/ssh-copy-id: INFO: 1 key(s) remain to be installed -- if you are prompted now it is to install the new keys
riguz@10.226.21.75's password:

Number of key(s) added:        1

Now try logging into the machine, with:   "ssh 'riguz@10.226.21.75'"
and check to make sure that only the key(s) you wanted were added.
生成秘钥
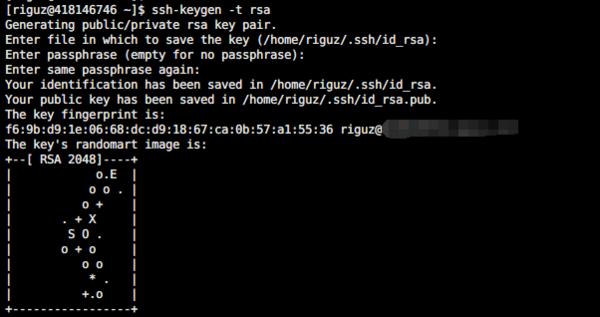
首先生成秘钥,秘钥短语可以不生成。
ssh-keygen -t rsa
cat ~/.ssh/id_rsa.pub >> ~/.ssh/authorized_keys
然后修改文件权限:
chmod go-w $HOME $HOME/.ssh
chmod 600 $HOME/.ssh/authorized_keys
chown `whoami` $HOME/.ssh/authorized_keys
修改sshd配置
vi /etc/ssh/sshd_config

RSAAuthentication yes
StrictModes yes
PubkeyAuthentication yes
AuthorizedKeysFile .ssh/authorized_keys
然后重启sshd服务:
service sshd restart
#centos 7:
systemctl restart sshd.service
然后就可以使用秘钥登陆了,把私钥(id_rsa)下载到本机登陆。注意权限的问题,另外,使用xshell登录的时候,还是要输用户名噢!(竟然犯了这么蠢的错误,还一直以为是权限的问题)
